
Water Bread Recipe (Pan de Agua) – Easy Homemade Caribbean Bread
Discover how to make authentic water bread recipe with our detailed guide. Learn the secrets to achieving a crispy crust and soft interior in this classic bread.

Every kitchen has its own story. Mine tells of warm, crusty bread that brings families together. My grandmother’s kitchen was filled with the scent of freshly baked water bread. It was a tradition that spanned generations.
This homemade bread was more than just food. It was a love letter made with simple ingredients and deep passion. The water bread recipe is a journey that turns basic ingredients into something extraordinary.
Whether you’re new to baking or have years of experience, mastering Pan de Agua opens up a world of bread-making skills. It goes beyond ordinary recipes. In this guide, we’ll dive into the art of making perfect water bread.
We’ll explore its rich heritage and how to make a crispy, golden loaf. Your kitchen will feel like a traditional bakery. Get ready for a delicious journey that celebrates simplicity and craftsmanship.
Table of Contents
Key Takeaways
- Learn the authentic water bread recipe from scratch
- Understand the cultural significance of Pan de Agua
- Master professional bread-making techniques
- Create restaurant-quality homemade bread
- Explore traditional baking methods
Understanding Pan de Agua: A Traditional Water Bread
Artisan bread is a tradition that values handcrafted techniques and real flavors. Pan de Agua is a standout example of rustic bread. It has deep cultural roots and unique qualities that make it different from regular bread.
Water bread has a long history that connects communities. It’s made with water, which is key to its texture and taste.
Origins and Cultural Significance
Pan de Agua comes from areas with strong bread-making traditions. It’s more than just food. It stands for:
- Community connection and shared culinary heritage
- Traditional baking techniques passed through generations
- A symbol of cultural identity and local cuisine
What Makes Water Bread Unique
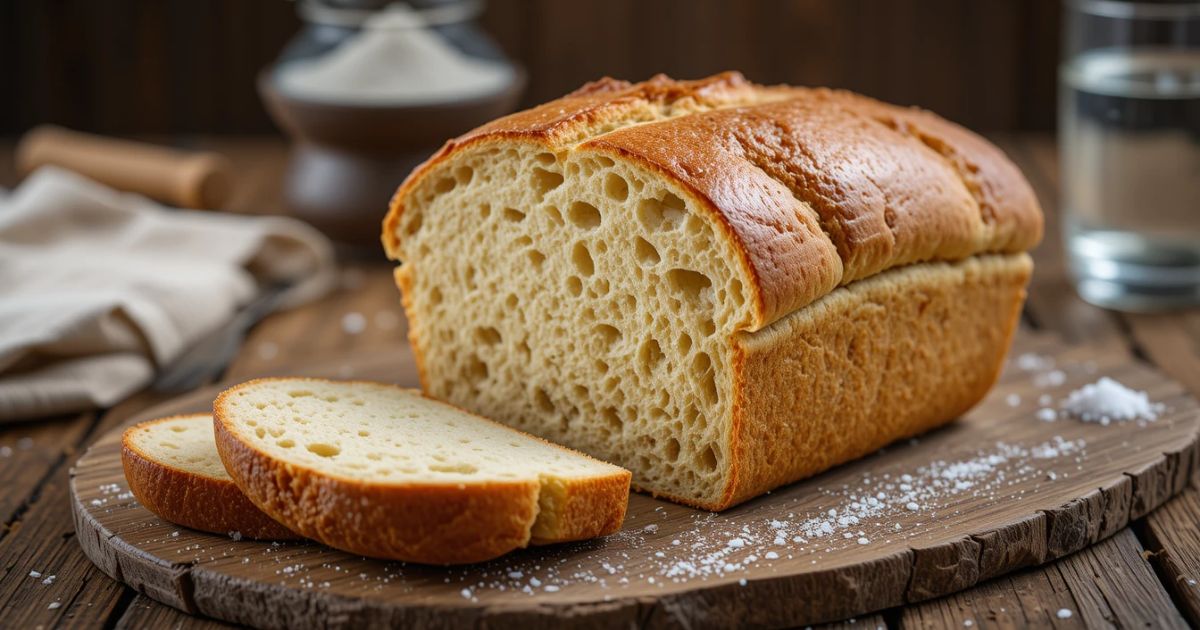
What makes Pan de Agua special is how it’s made and what it is. Unlike regular bread, it has:
- Exceptional crispy exterior
- Soft, airy interior
- Minimal ingredients
- Complex fermentation process
Key Characteristics of Authentic Pan de Agua
True Pan de Agua fans know it by its specific traits:
| Characteristic | Description |
|---|---|
| Crust Texture | Crisp and golden brown |
| Crumb Structure | Light, open, and irregular holes |
| Flavor Profile | Subtle, with slight tanginess |
| Hydration Level | High moisture content |
“Bread is the king of the table and all else is merely the court that surrounds the king.” – Louis Bromfield
Knowing these details helps bread lovers see the art in Pan de Agua. It turns it from a simple food into a rich experience of tradition and skill.
Essential Ingredients for the Perfect Water Bread Recipe
Bread making turns into an art with pan de agua. This traditional bread is simple yet tasty. It only needs a few key ingredients.
To make authentic water bread, you need to know each ingredient’s role. Here are the must-haves:
- Bread Flour: High-protein flour gives the right gluten structure
- Water: Use filtered or spring water
- Active Dry Yeast: This is the bread’s leavening agent
- Salt: It adds flavor and controls yeast growth
Choosing high-quality ingredients is key in bread making. Professional bakers know each part affects the bread’s texture and taste. For authentic water bread, use fresh, pure ingredients.
Choosing the right ingredients can make a simple bread into a special treat. It’s all about knowing how each part works together during making.
Pro tip: Always use room temperature ingredients for optimal fermentation and rising.
Whether you’re new or experienced, this easy recipe helps you make delicious water bread. It only needs a few simple ingredients.
Equipment and Tools Needed for Baking Pan de Agua
For great bread, you need the right tools. Whether you bake at home or aim for pro-quality no-knead bread, the right gear matters a lot.
Choosing the right tools turns bread baking into an art. We’ll show you the key tools and surfaces for making perfect water bread.
Basic Kitchen Equipment
- Large mixing bowl (ceramic or stainless steel)
- Measuring cups and spoons
- Kitchen scale for precise ingredient measurements
- Wooden spoon or silicone spatula
- Clean kitchen towels
- Sharp bread knife
Optional Professional Tools
If you want to improve your no-knead bread, consider these tools:
- Bench scraper for dough handling
- Proofing basket (banneton)
- Digital instant-read thermometer
- Dough whisk
- Lame (bread scoring tool)
Baking Surface Options
The right baking surface can make a big difference. Here are some good options:
- Baking Stone: Gives a crispy crust
- Dutch Oven: Creates a golden-brown crust
- Standard baking sheet with parchment paper
- Cast iron skillet for different baking methods
Quality bread baking equipment is key for pro-level pan de agua. Start with basics and add more as you get better.
Step-by-Step Water Bread Recipe
Making the perfect water bread recipe needs focus and love. It turns simple ingredients into a tasty loaf that will wow everyone.
Ingredients You’ll Need
- 4 cups bread flour
- 1½ cups lukewarm water
- 2¼ teaspoons active dry yeast
- 1 teaspoon salt
- 1 tablespoon olive oil
Mixing and Preparation
- Activate the yeast by mixing it with lukewarm water
- Mix flour and salt in a big bowl
- Make a well in the center and add the yeast mixture
- Knead the dough until it’s smooth and elastic (about 10 minutes)
The secret to great water bread is knowing the dough’s feel. It should be slightly tacky but not sticky.
Proofing Process
Let the dough rise in a warm, draft-free spot for about 1-2 hours. It should double in size, showing it’s fermented well.
| Stage | Duration | Expected Result |
|---|---|---|
| First Rise | 1-2 hours | Doubled volume |
| Shaping | 15 minutes | Smooth, tight surface |
| Final Proof | 30-45 minutes | Slightly puffy texture |
Professional bakers say patience during proofing is key for a great water bread. Slow fermentation brings out deep flavors, making it truly homemade.
“Bread baking is an art that rewards careful attention and passion.” – Artisan Baker’s Wisdom
Remember, the more you practice, the better you’ll get at this water bread technique. Each try will help you improve and learn more about bread making.
Mastering the Dough Consistency and Texture
Making perfect artisan bread is an art and a science. It needs precision and a feel for the dough. This is what makes the bread truly special.
Creating great water bread depends on three key things: how wet the dough is, how it’s kneaded, and its texture. Each step is important for turning simple ingredients into a wonderful loaf.
Proper Hydration Levels
The moisture in your dough is key. For artisan bread, you want it to be between 65-75% water to flour. This affects the bread’s texture and how it feels inside.
- Low hydration (under 60%): Dense, tight crumb
- Medium hydration (65-75%): Ideal for most water bread recipes
- High hydration (over 80%): Open, airy crumb with large holes
Kneading Techniques
Kneading makes the dough strong. It’s what gives bread its shape. Bakers use different ways to knead to get the best dough.
| Kneading Method | Technique | Best For |
|---|---|---|
| Traditional Hand Kneading | Fold and press repeatedly | Developing muscle memory |
| No-Knead Method | Long, slow fermentation | Minimal hands-on time |
| Stretch and Fold | Gentle folding at intervals | Preserving air bubbles |
Visual Cues for Perfect Dough
Knowing when the dough is ready is important. Look for these key indicators:
“A well-developed dough should feel smooth, elastic, and slightly tacky—not sticky or dry.”
- Windowpane test: Stretch a small piece of dough until translucent
- Bounce-back test: Gently press dough; it should slowly return to shape
- Surface appearance: Smooth and uniform without visible flour patches
Learning these skills makes bread making a true art form.
Proofing and Fermentation Guide

Proofing is a key step in bread baking. It turns simple ingredients into a delicious rustic bread. This process lets dough develop rich flavors and get the right texture through fermentation.
To grasp the fermentation process, focus on a few important things:
- Temperature control
- Humidity levels
- Time duration
- Dough consistency
For great bread baking, watch your dough closely. The first rise, or bulk fermentation, usually takes 1-2 hours at room temperature. This is when yeast makes carbon dioxide, creating the air pockets that make rustic bread so special.
Professional bakers say to look for these signs of good fermentation:
- Dough should grow by about 50-75%
- Surface should look smooth and slightly domed
- Gentle press should leave a slight indentation
- Bubbles should be visible underneath the surface
Cold fermentation can make flavors more complex. Putting the dough in the fridge for 12-24 hours helps slow down flavor growth. This makes your rustic bread taste even better.
The secret to exceptional bread baking lies in patience and understanding your dough’s unique characteristics.
Baking Techniques for Crusty Water Bread
Making the perfect crusty bread needs precision and knowing how to bake. An easy bread recipe can become a masterpiece with the right baking skills. Professional bakers know that a crispy exterior is more than just mixing ingredients.
The secret to a great crusty bread is in three key areas: controlling temperature, creating steam, and using careful baking methods.
Temperature Control Secrets
For successful crusty bread, oven temperature is key. Experts suggest:
- Preheat the oven to 450-475°F
- Keep the heat steady during baking
- Use an oven thermometer for exactness
Steam Generation Methods
Steam is vital for a crisp crust. Home bakers can make steam in several ways:
- Put a cast-iron skillet with water on the bottom rack
- Spray water into the oven before baking
- Use a steam pan with boiling water
Crafting the Perfect Crust
To get that golden-brown, crackling crust, pay close attention. Bake your water bread until it’s a deep amber, usually 25-35 minutes. Let it cool completely on a wire rack to keep its crispy exterior.
Professional bakers say an easy bread recipe turns into something special with these baking tricks. With practice and patience, you can make irresistible crusty bread every time.
Troubleshooting Common Water Bread Issues

Baking bread can be tough, especially with homemade water bread. Bakers face specific problems that affect the bread’s quality. Knowing these common issues can help you get better at making bread.
Dense bread is a common problem. It happens for a few reasons:
- Insufficient kneading time
- Using old or inactive yeast
- Incorrect water temperature
- Overworking the dough
Poor rising is another big issue. Proper yeast activation and environment are crucial for good homemade bread. Things that can affect rise include:
- Cold kitchen temperatures
- Expired yeast
- Too much salt in the recipe
- Not allowing enough proofing time
Uneven baking and pale crusts can also be a problem. To fix these, try different baking methods. Use high temperatures, create steam, and rotate the bread for even baking.
Pro tip: Always check your ingredients’ freshness and follow precise measurements in bread making.
Getting good at water bread takes practice, patience, and knowing how to fix common problems. Every try gets you closer to making perfect homemade bread.
Storage Tips and Serving Suggestions
Keeping your artisan bread fresh is key. It’s important to store and serve it right. This way, your homemade rustic bread stays delicious and fresh.
Storing your water bread right can make it last longer. This lets you enjoy every tasty bite of this traditional bread.
Optimal Storage Techniques
- Store at room temperature in a bread box for 2-3 days
- Wrap loosely in paper bag to maintain crust crispness
- Avoid plastic bags, which can make rustic bread soggy
- Refrigerate only if absolutely necessary, as cold can dry out bread
Freezing Your Water Bread
Freezing is a great way to keep your artisan bread for later. Here’s how to do it:
- Cool bread completely before freezing
- Wrap tightly in plastic wrap and aluminum foil
- Store in freezer for up to 3 months
- Thaw at room temperature for best texture
Creative Serving Suggestions
Rustic bread is very versatile. It can make many dishes better:
- Serve alongside soups and stews
- Create gourmet sandwiches
- Use for bruschetta or crostini
- Pair with olive oil and balsamic vinegar
Your homemade water bread can turn simple meals into special moments. It shows off the beauty of artisan bread making.
Conclusion
Mastering water bread takes patience, practice, and passion. The recipe we’ve shared opens the door to traditional bread baking. It connects you to generations of skilled cooks.
Each loaf is more than food; it’s a celebration of skill and heritage. As you start baking, remember that every try gets you closer to perfection. The techniques in this guide are a good start, but real skill comes from doing it yourself.
Try different water levels, kneading ways, and baking temps to find your style. Bread baking is a mix of science and art. It’s rewarding and makes your kitchen a place of wonder.
Don’t worry if things don’t turn out right at first. Every loaf teaches you something new. It’s about texture, fermentation, and technique.
We encourage you to share your bread baking stories with us. Share your journey, celebrate your wins, and learn from your mistakes. Your love for bread making adds to a global tradition that inspires many.
FAQ
What is Pan de Agua, and how is it different from other types of bread?
Pan de Agua is a traditional water bread known for its crispy outside and soft inside. It uses a simple ingredient list. The exact water and baking methods create its unique texture and taste.
Do I need any special equipment to make water bread at home?
You don’t need fancy tools to make Pan de Agua. Basic kitchen items like a bowl, cups, and a baking sheet are enough. A Dutch oven or stone can improve the crust, but they’re not essential.
How difficult is it to make water bread for a beginner baker?
Making water bread is easy for beginners. It needs just a few ingredients and simple steps. Paying attention to hydration and baking will help you make delicious Pan de Agua.
What are the key ingredients for authentic water bread?
Pan de Agua’s traditional recipe has four main ingredients: flour, water, yeast, and salt. This simplicity lets bakers focus on technique for the perfect texture and flavor.
How long does it take to make water bread from start to finish?
Making water bread takes 3-4 hours, including prep, proofing, and baking. Most of this time is waiting, so you’ll only spend a little time actively working. The fermentation process is key for flavor and texture.
Can I store homemade water bread, and how long will it stay fresh?
Enjoy Pan de Agua within 1-2 days for the best taste. Store it in a paper bag at room temperature to keep the crust crispy. Freeze it for up to a month if you want to keep it longer, making sure it’s wrapped well.
What are common mistakes to avoid when making water bread?
Avoid using the wrong water temperature, over or under-proofing, and not enough steam during baking. Focus on precise measurements, temperature, and techniques to avoid these mistakes.
Can I make water bread without a stand mixer?
Yes, you can make Pan de Agua by hand. Traditional methods prefer hand kneading. This lets you feel the dough’s texture and development better. You only need a bowl and your hands.
Are there gluten-free options for water bread?
You can try gluten-free flour blends for Pan de Agua. But, the texture and rise will differ from the classic recipe. You might need special techniques and extra ingredients.
What are some traditional ways to serve water bread?
Pan de Agua is very versatile. It’s often served with meals, used in sandwiches, or enjoyed with olive oil and salt. In many places, it’s a breakfast favorite or goes well with soups, stews, and main dishes.